Creating a Bell Sound With 3Xosc
The following article will show you an uncomplicated and quick way to create a summery bell sound with the 3xOsc. This should be easy to understand and put into practice even for beginners in music production and the result is extremely popular and widely used in ambient music.
Basically, we are going to use a 3-oscillator, but any synth that has a syne wave tone generator should do the work as well. You can choose whatever feels most comfortable.
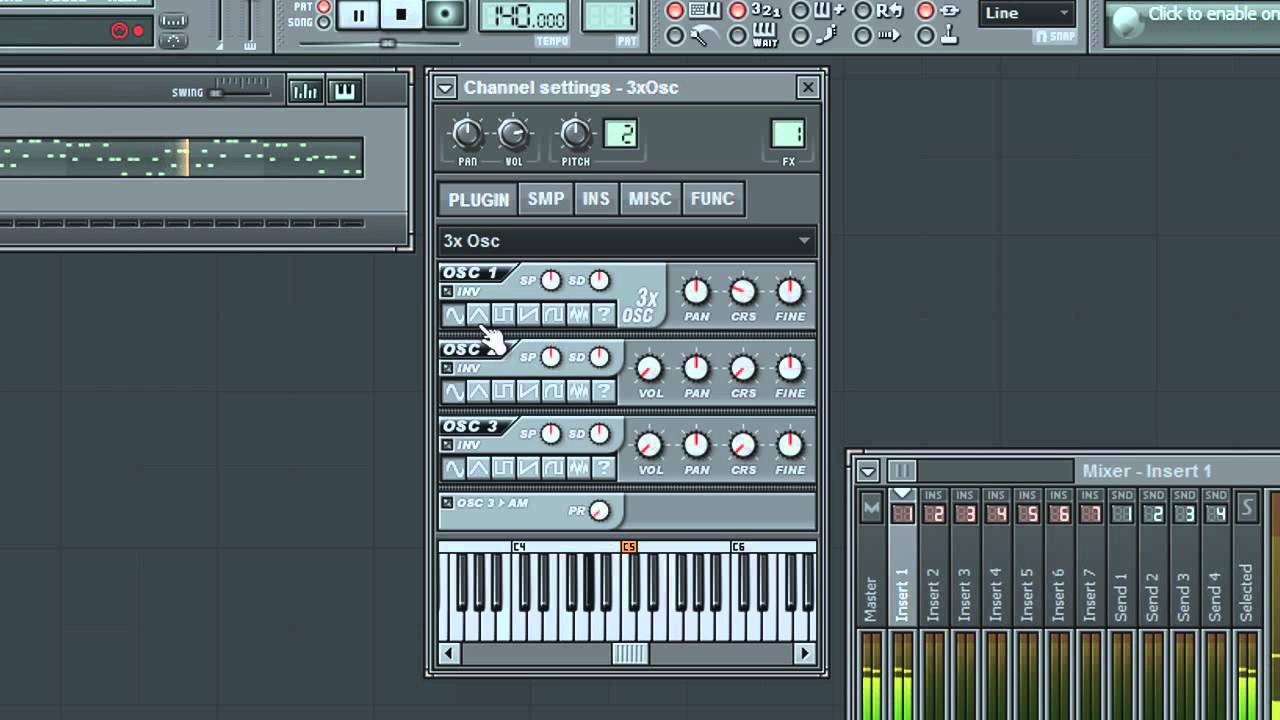
Begin with loading the 3xOsc to a new Studio project and choose sine as the waveform for the first Oscillator. The great news is that to create the bell sound we need only one oscillator, so turn the volume of the other ones to 0%, thus disabling them. It can’t get easier than this!
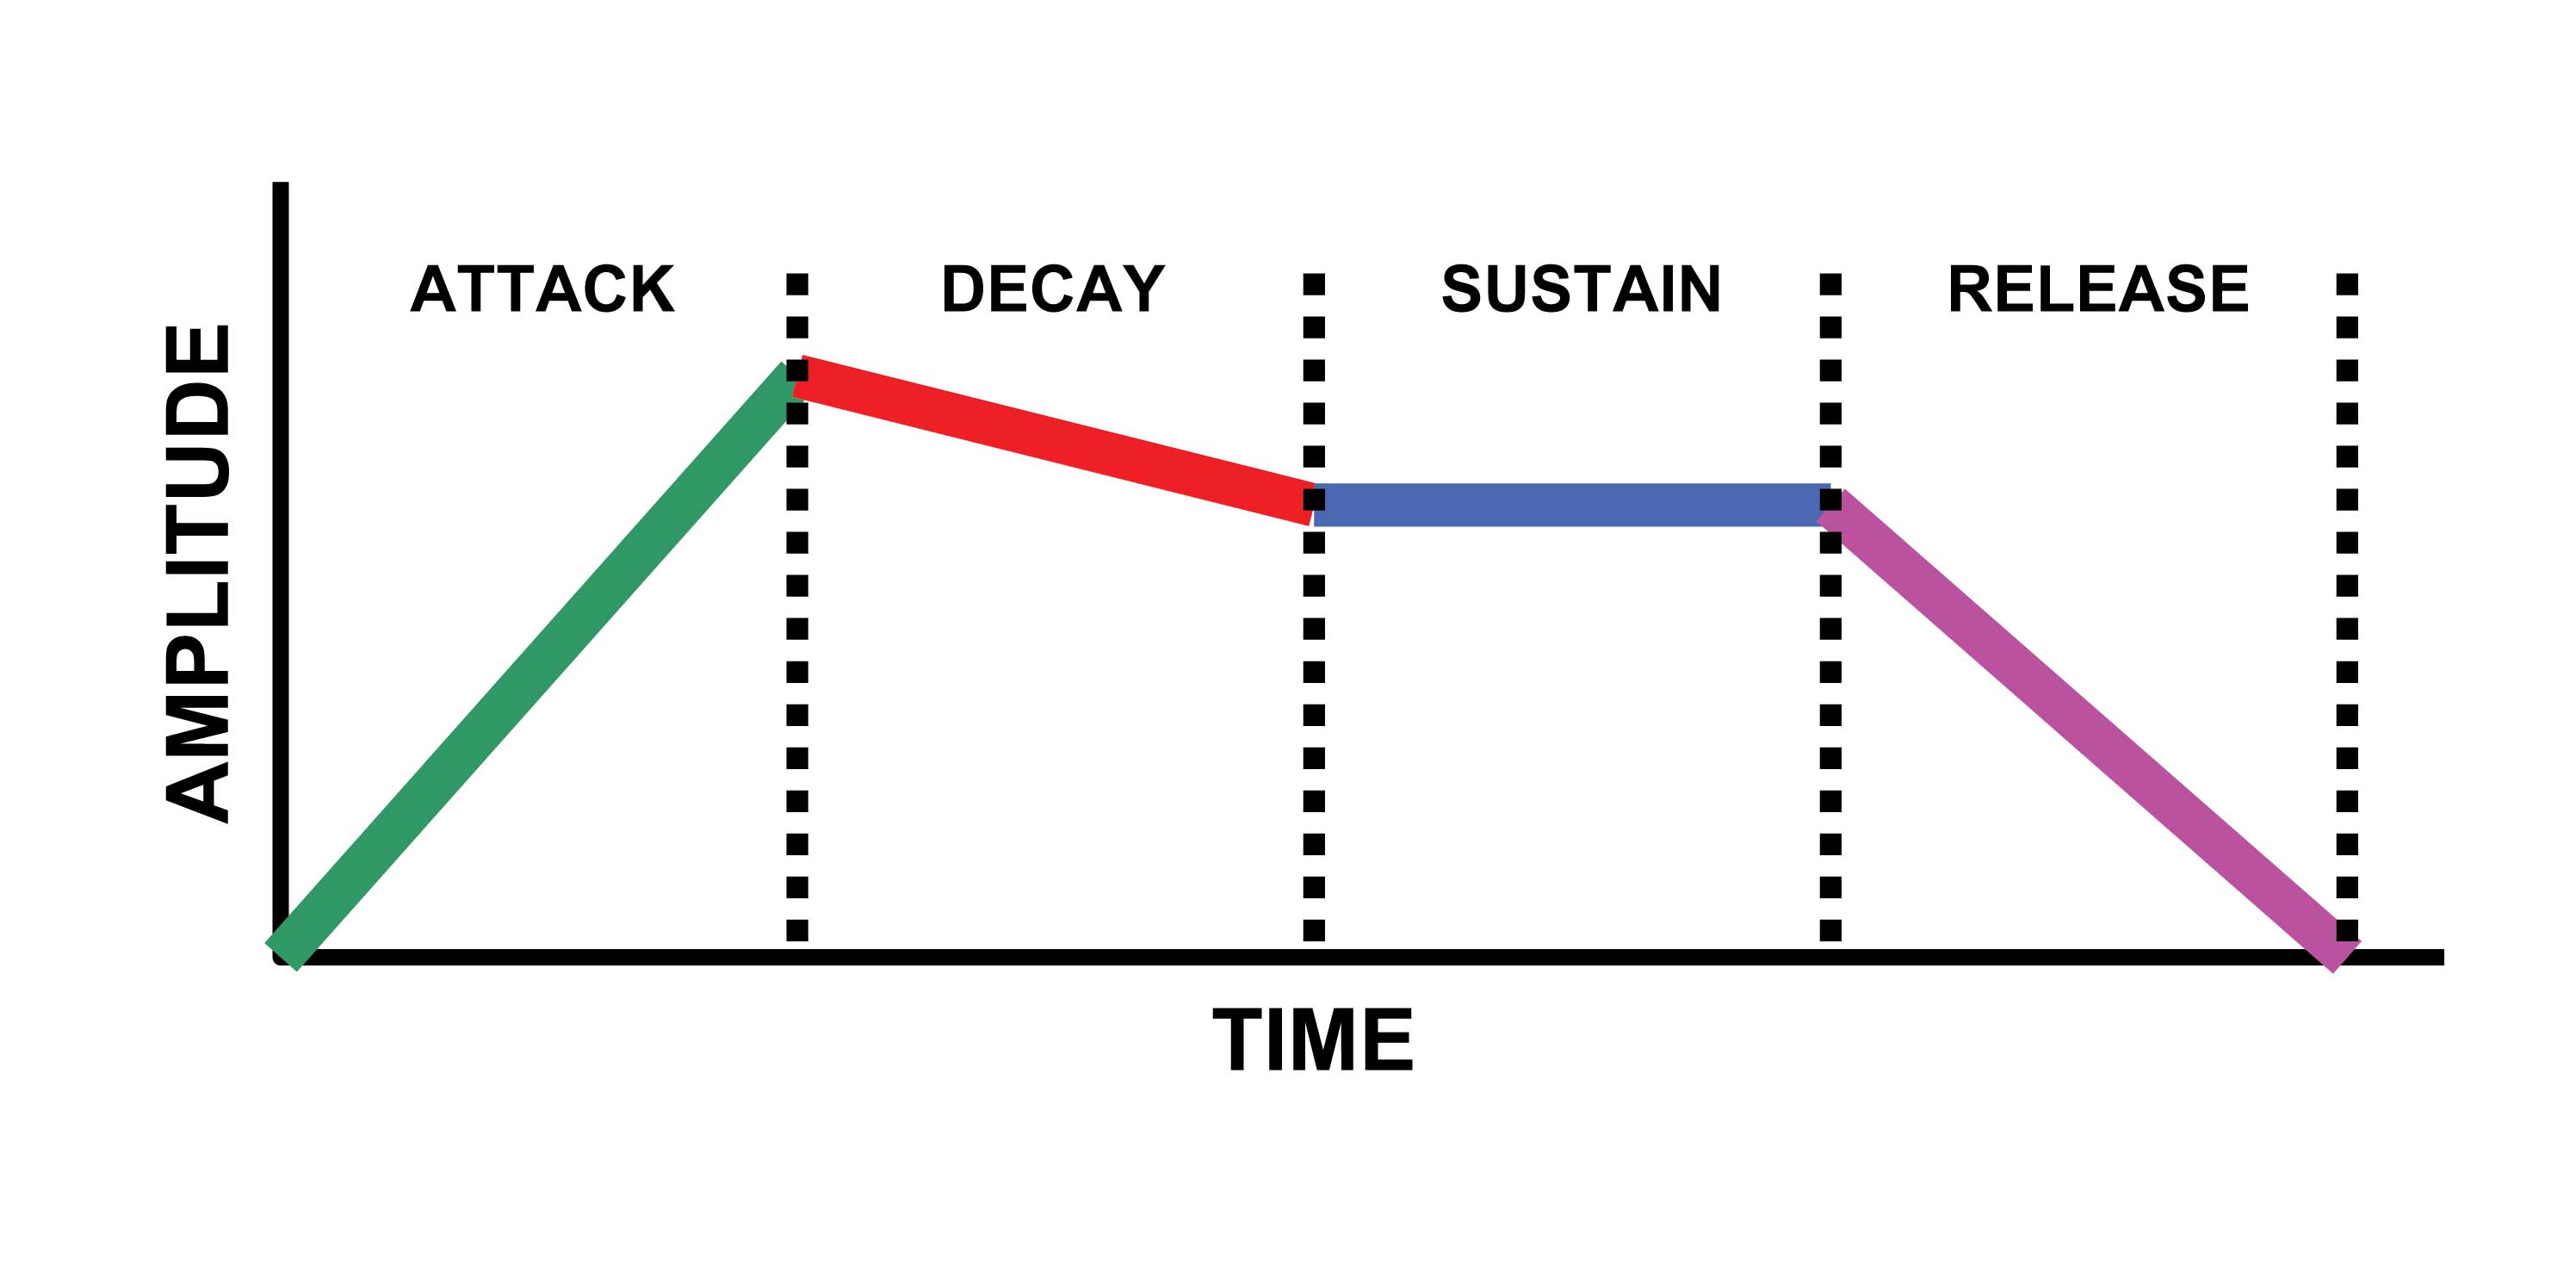
Next, search for the Instrument Properties box (the INS-tab) and in the volume envelope section (VOL) activate the “Use envelope” knob. After you’ve enabled it, modify its curve as follows: short ATT, fairly low Sustain and semi-long Release time.
Moving further with the settings, click on the tension button to edit its envelope line shapes too. It should look like this: lower Decay level to increase the drop from Sustain – this is key for a sharper sounding bell. Also lower the level between SUS and REL in order to avoid a ear-splitting chime.
Finally, to add more texture to the freshly created bell sound and also to obtain that warm, summery color, use a little reverb. To do this you have to allocate the 3-oscillator to a free mixer track and add a reverb effect. To make the sound feel less wiry set the Color of the Reverb to warmer (twitch the knob all the way to the right). Also set the Decay to 7 seconds, turn off the high damping and turn the reverb level to 24%.
So there you have it – a simple and fast way to create a popular sound effect that you can later use in your musical creations. Bells are really popular in Trap music so setting up a 808 Bass along this type of sound should be a good start for a brand new song. Hope this came as great help but don’t forget to let us know what you think about this tutorial in the comment section below. Enjoy and start working!


