Hitting The Key Points When Mixing EDM (Part 1)
Even if it’s a must do after developing a brand new track, mixing isn’t something you can learn over night when making beats. You can be an active producer for several years and still have new things to learn because this stage is always developing new techniques to make tracks sound more powerful and genuine.
Electronic music is probably the most active domain exploring new ways to mix sounds and tracks so this is why today we’re going to tackle a few key points to tweak those knobs after you finished the recordings. Patience and a pair of good headphones is all you need so let’s see if we can learn something new when making the beat with this tutorial.
What should you start with if you’re making the beat?
When making music every process has a started point even if you should always try to develop your own methods and algorithms. However if you’re a straight rookie and you just started mixing your tracks you should begin by setting some general numbers to a few destined parameters because this will definitely help you understand how the basic steps are actually working in this process.
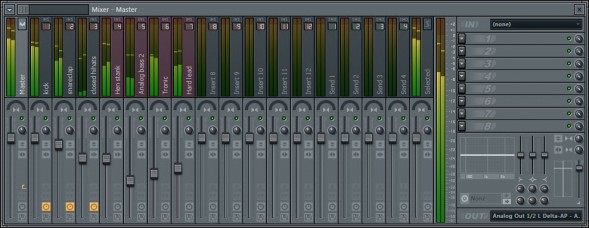
Before getting to business you should actually start with preparing for the mix. The first step here should mean something like dropping the master channel volume to around -6.0dB or even lower. This is mean to leave some headroom between the loudest peaks and 0.0 dB just so you can avoid clipping. Clipping usually occurs when you have lots of sounds and instruments when making beats and if you save this to a WAV file it’s actually pretty hard to fix if it’s not in 32 bit floating point format so better be prepared and take action in advance.
It doesn’t matter if your track isn’t loud enough at this stage because you will be able to normalize the volume once you master the track in its WAV format. Also, you can use compressors at that point so everything will be fine, don’t worry. After this, drop all levels to 0 and begin with the next step.
Mix the drums while making the beat
The drum section should always be approached when starting to mix your track because this will lead the main rhythm for your track. Start by setting the kick drum mixer track at 0.0dB and in Electronic music this should represent the main asset for a track if you’re making beats. Never pan your kick drum, keep it centered. Panning is great, it’s destined to create a panorama with your sounds but the kick should always hit in center for enough power.
Also, when building the drums don’t be afraid to add more than just one kick or a snare if the beat is not powerful enough. After mixing the kick go ahead and start raising those levels. Carry on with claps and snares and try to normalize the volume so it will match the kicks while you’re making the beat. Add a gentle reverb if you’re able to and go on next with the percussion section.
Use pan to closed hi hats and don’t be afraid to make them sound left or right, it’s not mandatory to keep them centered when you’re making beats. Also, reverb might come with a decent impact for percussions as well. Panning and EQ-ing helps with separating closed and opened hi hats as they’re often found in the same frequency range.
As a general rule for this section, try to find the perfect balance between each element and don’t add too many sounds because the track will begin to sound messy and we don’t want that to happen. Stay tuned for part 2 when we’ll get to the Bass section, a crucial asset in Electronic music.
